Standard Operating Procedures (SOP)
Stationary auto glass removal and installation
Step 1
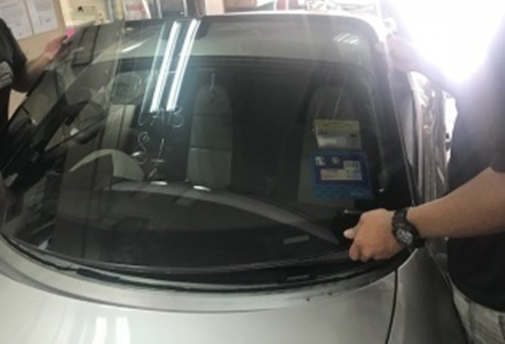
Glass Removal
Apply interior surface protection. Remove wiper blades and cowl panel. Remove windshield molding. Cut sealant with the appropriate tool. Remove glass.
Step 2

Preparing Damaged Pinchweld
Remove all of the old sealant from the damaged area only. For the undamaged pinchweld, leave the sealant intact at this time.
Step 3

Scuff pinchweld area with general purpose scuffing pad and clean the pinchweld area.
Step 4

Apply Primer to Pinchweld if Necessary
Clean the pinchweld area with water and a clean cloth with thinner/activator.
Step 5

Check the expiration date on the primer, and shake the primer well. For the undamaged pincheweld area, apply the primer to any bare metal scratches. For the damaged pinchweld area that has been repaired, apply a continous layer of primer to the newly abraded and cleaned epoxy primer. Allow 5-10 minutes of dry time for the primer.
Step 6
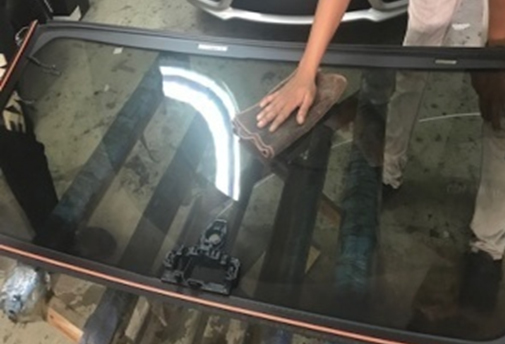
Clean and Prepare Glass
For new glass, clean glass with glass cleaner and a clean cloth. Thinner/activator will be used to clean side of the glass for perfect installation.
Step 7

Windscreen Tinting (If Required)
We provide windscreen tinting service with our brand namely SAHARA-X, 2/4/6mil Car Safety Window Film Tint. Sahara-X window tints are suitable for every climate and temperature and are widely used in all types of cars. This is one of the Best Window Film in Malaysia that is of a very high quality.
Step 8

Apply Sealant and Install Glass
Check the expiration date on the sealant. Cut the application nozzle to the desired width and shape and install the flex pack into the applicator gun. Apply sealant to either the close-cut sealant on the undamaged pincheweld area and/or the prepped epoxy primed area of the new pinchweld. Reinstall moldings and interior panels as needed.
Step 9

Paddle all gaps in the sealant in one direction and install the glass.
Step 10

Wipe clean the glass after the installation.
Step 11

Tape Removal
Remove all tapes after 1 day after delivering the vehicle. For best results, remove it in a slow, uniform motion. Remove it in the directon of the painted surface to the windshield, and remove the tape at an angle of approximately 135⁰ to the surface. Tape removal works best if the temperature is above 60⁰F.
Step 12


Refrain from Car Wash
Our customers are advised to wait 24 hours after the windshield is replaced before going through a car wash. The chemicals and water pressure may affect the installation. The higher pressure of the water spraying your car can wreck the auto glass seal and outer mouldings if they have not completely cure yet.
But nevertheless should there be any rain or water, it isn’t an issue on newly replaced auto glass, so don’t fret if there’s forecast calls for a bit of downpour. In fact, a bit of moisture can actually help the adhesive cure faster.
Step 13

QC Inspection
QC inspection will be conducted on each completed vehicle before handing over to the owner.
Step 14

Customer Service
Providing good customer service is our priority. After 3 days of the windshield replacement, our customer service team will follow up with our customers on their satisfaction review.